Inventory System with POS
0 Sales
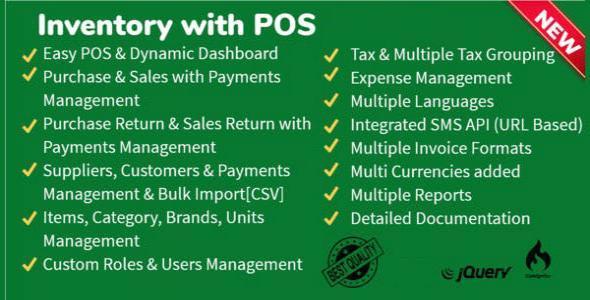
Inventory with POS is a web application software user can track Items & Stock Items, Manage Suppliers, Manage Customers, Items Categories, Sales, Purchase, Manage users and get all the reports which are require to your office and many more features.
Demo Link:
Username: admin
Password: 123456
Dashboard:
Attractive dashboard
View Shortcut links of most usable links
POS Shortcut Link
New Category
New Item
New Supplier
New Customer
New Purchase
New Sales
View Total number of Suppliers
View Total number of Customers
View Total number of Purchases
View Total number of Sales
View Expired Items List
View stock alert
View recently added items list.
Bar Chart of Sales and Purchase
Pie Chart of Sales Items %
Categories:
You can view the all the added categorys list and you can manage categorys list by Delete & Edit actions.
Brands:
You can view the all the added Brands list and you can manage Brands list by Delete & Edit actions.
Items:
You can view the all the added Items list and you can manage Items list by Delete & Edit actions.
Print Labels :
Select Items From Search Box and Select Number of quantities of Labels and Click on Preview Button and take prints.
Supplier:
Adding a Suppliers it's a very easy task. Enter Supplier name, Mobile, Phone, Email, GST Number, TAX Number, Opening Balance, Country(Optional field), State, City, Postcode(Optional field), Address(Optional field) and click on Save button.
Customer:
You can view the all the added Customers list and you can manage Customers list by Delete & Edit actions.
Purchase:
Creating or entering a Purchase information in inventory is a very easy task. You need to select date, Suppliers name from selection box (Also user can Instantly create Supplier), Purchase Status(Received / Pending / Ordered), and reference number(Optional field), and you need select the items from the Search Box, here you search item by item name, Barcode, Itemcode, after selecting item from search box, all other information will be shown in the same row, it includes Item name,Purchase quantity, purchase price, Tax, Discount, and Total amount and you select any number of items in purchase table. You also enter Other charges, Discount on All Items, Purchase Note and Purchase Payment Informations in signle form.
Purchases Return:
You can view the all the added Purchases Returns list and you can Purchases Return list by Delete & Edit actions.
Sales:
POS Sales : Easy version sales entry. Here you can sell to Specific or Walk-in Customer.
Select Items from Item Search box using Item name, Barcode or Item code.
Select Items From Right Side Box, Also given category wise search and Specific Item Wise search Box.
From Items List You can Increase or Decrese Item Quantities. On Total amount You Provide Discount on Overall sales.
Payments Can Be access with Cash Or Multiple Payments Oprions!
Send SMS : If you want you can send the SMS to Existing/Saved Customer when Invoice Generate. SMS Template available in SMS -> SMS Templates menu bar. [Note: Walk-in Customer will receive any SMS]
POS Invoice : POS Formatted invoice.
Sales Return:
Creating or entering a Sales return information in inventory is a very easy task. Select Customer,You need select the items from the table, where item name has the standard search box for items name, here you need to select item name, all other information will be shown in the same row, available quantity, sales quantity,UQC,Tax and you select any number of items in purchase table and click on Save button.
Expense::
Creating or entering a Expense information in inventory is a very easy task. Select Date, Select Category Name, enter Expense for, enter Amount, enter Reference no., enter Note and click on Save button.
Places:
New Country:
Places -> New Country
Adding a Country it's a very easy task. Enter Country name and click on Save button.
Country List:
Places -> Country List
You can view the all the added Country list and you can manage Country list by Delete & Edit actions.
New State:
Places -> New State
Adding a State it's a very easy task. Enter State name, select country name and click on Save button.
States List:
Places -> States List
You can view the all the added State list and you can manage State list by Delete & Edit actions.
Users:
Adding a User it's a very easy task. Enter user name, Mobile number, Email ID, Role(Admin/Sales/Purchase), enter password and confirm the password fields of the new user and click on Save button.
Report:
Sales Report:
Reports -> Sales Report
Select from date, to date and customer name-> click on show button.
In the same form it will shows all the required information
You can export the report data into excel format.
Sales Return Report:
Reports -> Sales Return Report
Select from date, to date and customer name-> click on show button.
In the same form it will shows all the required information
You can export the report data into excel format.
Purchase Report:
Reports -> Purchase Report
Select from date, to date and Supplier name-> click on show button.
In the same form it will shows all the required information
You can export the report data into excel format.
Purchase Return Report:
Reports -> Purchase Return Report
Select from date, to date and Supplier name-> click on show button.
In the same form it will shows all the required information
You can export the report data into excel format.
Expense Report:
Reports -> Expense Report
Select from date, to date and Category name-> click on show button.
In the same form it will shows all the required information
You can export the report data into excel format.
Profit & Loss Report:
Reports -> Profit & Loss Report
Stock Report:
Reports -> Stock Report Item Wise
Reports -> Stock Report Brand Wise
Item Sales Report:
Reports -> Item Sales Report
Select from date, to date and Item name-> click on show button.
In the same form it will shows all the required information
You can export the report data into excel format.
Purchase Payments Report:
Reports -> Purchase Payments Report
Select from date, to date and Supplier name-> click on show button.
In the same form it will shows all the required information
You can export the report data into excel format.
Sales Payments Report:
Reports -> Sales Payments Report
Select from date, to date and Customer name-> click on show button.
In the same form it will shows all the required information
You can export the report data into excel format.
Expired Items Report:
Reports -> Expired Items Report
Select from date and Item name-> click on show button.
In the same form it will shows all the required information
You can export the report data into excel format.
This item has not reviews yet.

Rahul Singh
DM
Follow


This item has not comments yet.